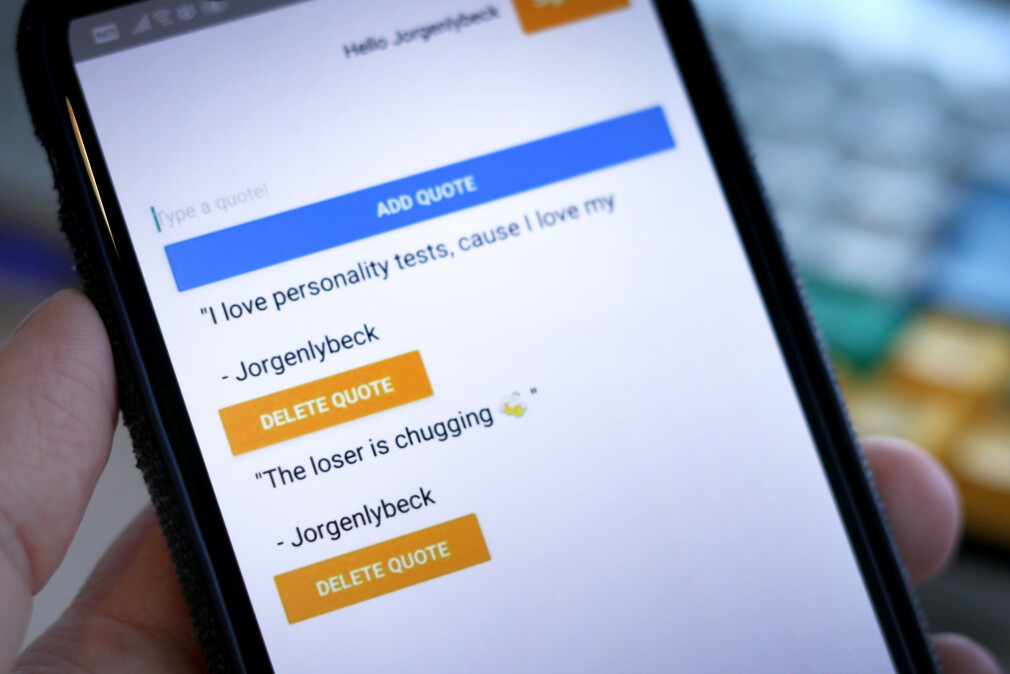
This is a bonus in my series. More and more people I talk to want to try something new, so why not try mobile applications with React Native and an Amplify backend. I’ll make this tutorial as short as possible, to show you how easy it is!
In this tutorial, I’ll make a mobile app to post quotes to a DynamoDB document and see updates in real-time on all devices. I’ll use React Native with AWS Amplify as the backend, using Auth, and GraphQL API. See my previous tutorials to learn more about these!
👉 Destroying Backends with Serverless — Introduction, and Authentication
👉 Destroying Backends with Amplify — AppSync GraphQL API
Let us create
First, get started with React Native. Globally install the Expo CLI and run expo init “project name”.
npm install -g expo-cli
expo init quoted
cd quoted
When inside the project directory, install the Amplify CLI and initiate it in your project. This requires you to have at least a Free Tier AWS account. With this, you’ll configure Amplify for your project, but don’t worry. It’s all done through the Amplify CLI.
npm install -g @aws-amplify/cli
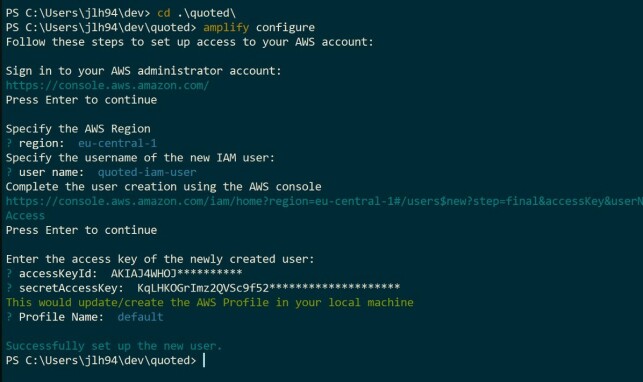
amplify configure
This will initiate a set of prompts.
- Choose the region closest to you, and hit enter.
- Give the IAM user a name and hit enter. You’ll be automatically taken to the AWS browser console, and log in with your user.
- Then hit ‘enter’ in the CLI to proceed after logging in.
- That takes you to the IAM service, to create a user with admin privileges. Choose all the defaults.
- When done, copy the Access Key, go to the CLI, paste it, hit enter, go back, copy the Secret Key, go to the CLI, paste it, hit enter and done!
Create a /src folder in the application directory and initiate Amplify. This takes you through another 5 prompts, which are easily filled out. The folder you use as Source Directory Path is the directory where the aws-exports.js file will appear, which is used to Amplify.configure() your client. More on that later.
mkdir src
amplify init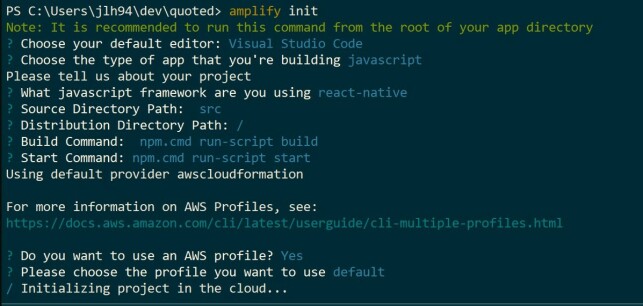
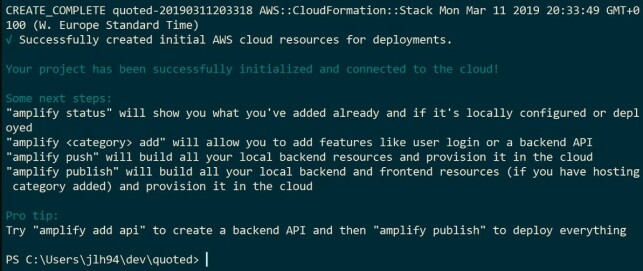
The commands ‘amplify push’ and ‘amplify publish’ will generate aws-exports.js. If you use GraphQL API (we will later) it will ask you to update generated code to communicate with the API. If you use ‘publish’ you need hosting enabled, which automatically publishes the app to your S3 bucket with web hosting.
Adding Auth and GraphQL API
amplify add auth
> use default config
> that's it
amplify add api
> Pick GraphQL
> Pick API name (default is your project name)
> Pick Cognito as Auth mechanism
> Pick No for having your own schema
> Pick Yes for automatic schema creation
> Pick Yes to edit the schema now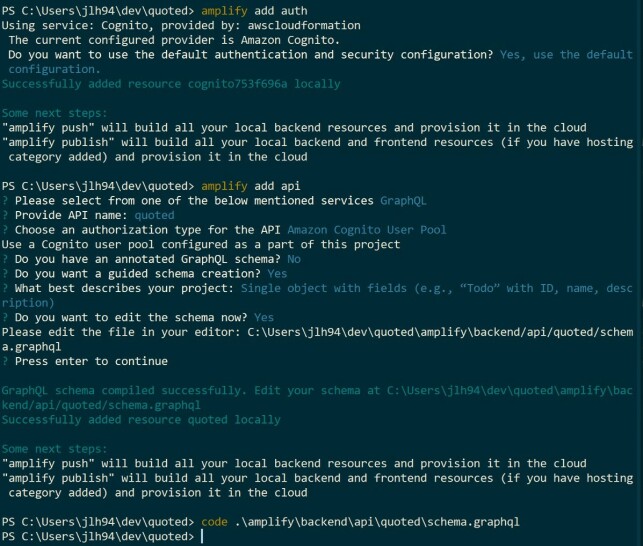
Locate the schema with your editor, modify it and save. When you’re happy with your schema/data model then run amplify push and hit yes to all options. This autogenerates a directory ‘quotes/src/graphql’ with 3 files; subscriptions.js, mutations.js and queries.js. They contain code to CRUD to your GraphQL server.

Down to the client
While building the Amplify template in AWS (amplify push), open another console window, cd into your project directory and run ‘expo start’. This starts an expo server for developing/testing your React Native application. Also, download the Expo mobile application. I use Android.
A QR code will show up in your console, and a browser window with your running expo server will launch.
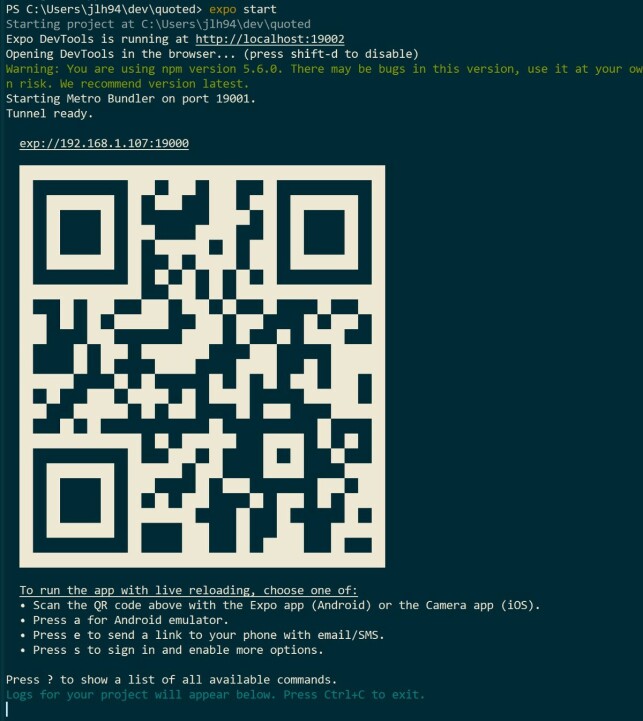
If your Amplify backend has completed uploading the template, download the 2 NPM packages required to connect your client to Amplify
npm install --save aws-amplify aws-amplify-react-nativeThe final client code
Now, to finish up our application, we need to add the React Native code. I suggest creating a new file Root.js in your /src folder. Reference Root.js from App.js and wrap it with Amplify withAuthenticator(). Connect the generated aws-exports.js file with Amplify.configure(). This file is for setting up all configuration before using Amplify in Root.js.
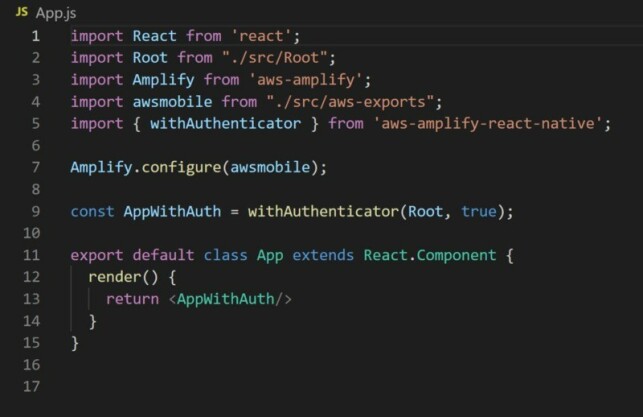
Root.js
We’ll do most of our work in this file. The reason for this is that we use App.js to link to Cognito, and we want the user to be authenticated before actually calling the API. I’ll explain what you’re seeing in both of these files.
The imports
- { withAuthenticator } is used as a HOC on our export to wrap the whole application with a premade authorization interface.
- Amplify, { API, graphqlOperation } is used to invoke our API with the functions imported from our generated /graphql directory.
- * as queries, mutations, subscriptions are the generated code by Amplify that we use to invoke GraphQL functions.
- { awsmobile } is the file generated by Amplify with our API endpoint, Cognito keys etc. Don’t store this file in a repository.
- Amplify.configure(awsmobile) is the process of actually hooking up our keys, endpoints etc. to our client.
- And the react-native imports are components used by React Native to compile to Android Java and IOS Swift.
The CRUD’ing
In the Root.js file, I’ve created some simple functions for adding and deleting quotes, as well as using the powerful GraphQL Subscriptions to get real-time data flow to our GUI. Simply, every time ‘createQuote’ successfully returns data, it is listened to in the Subscription where we can add it to our state array. We set up all our subscriptions in the componentDidMount() to be called once, as well as calling the queries.listQuotes.
import React from 'react';
import { StyleSheet, Text, View, FlatList, TextInput, Button } from 'react-native';
import { API, graphqlOperation } from 'aws-amplify';
import * as queries from "./graphql/queries";
import * as mutations from "./graphql/mutations";
import * as subscriptions from "./graphql/subscriptions";


export default class Root extends React.Component {

    constructor(props) {
        super(props);
        this.state = {
            quotes: [],
            input: ""
        }
    }

    componentDidMount() {
        this.getQuotesList();
        API.graphql(graphqlOperation(subscriptions.onCreateQuote)).subscribe({
            next: (data) => {
                console.log(data);
                const addedQuote = data.value.data.onCreateQuote;
                this.setState({ quotes: [addedQuote, ...this.state.quotes] });
            }
        });
        API.graphql(graphqlOperation(subscriptions.onDeleteQuote)).subscribe({
            next: (data) => {
                console.log(data);
                const removedQuote = data.value.data.onDeleteQuote;
                const updatedList = this.state.quotes.filter((quote => {
                    return quote.id !== removedQuote.id;
                }))
                this.setState({ quotes: updatedList });
            }
        });
    }

    getQuotesList = async () => {
        try {
            const response = await API.graphql(graphqlOperation(queries.listQuotes));
            this.setState({ quotes: response.data.listQuotes.items });
        } catch (err) {
            console.error(err);
        }
    }

    addQuote = async () => {
        try {
            const quoteObj = {
                quote: this.state.input,
            }
            await API.graphql(graphqlOperation(mutations.createQuote, { input: quoteObj }))
            this.setState({ input: "" });
        } catch (err) {
            console.error(err);
        }
    }
    deleteQuote = async (id) => {
        try {
            await API.graphql(graphqlOperation(mutations.deleteQuote, { input: { id: id } }))
        } catch (err) {
            console.error(err);
        }
    }

    render() {

        return (
            <View style={styles.container}>
                <TextInput
                    style={{ height: 40 }}
                    value={this.state.input}
                    placeholder="Type a quote!"
                    onChangeText={(text) => this.setState({ input: text })}
                />
                <Button title="Add Quote" onPress={this.addQuote} />
                <FlatList
                    data={this.state.quotes}
                    renderItem={({ item }) => (
                        <View key={item.id}>
                            <Text style={styles.item}>"{item.quote}"</Text>
                            <Text style={styles.item}>- {item.owner}</Text>
                            <View style={{ width: 150 }}>
                                <Button title="Delete Quote" color="#ffa500" onPress={() => this.deleteQuote(item.id)} />
                            </View>
                        </View>

                    )}
                />
            </View>
        )

    }
}

const styles = StyleSheet.create({
    container: {
        flex: 1,
        paddingTop: 22,
        marginLeft: 20,
        marginRight: 20
    },
    item: {
        padding: 10,
        fontSize: 18,
        height: 44,
    }
})
What now?

- We have a very simple mobile application. I will proceed with adding styles and animations. I might write about this in another more React Native focused tutorial.
- You can sign an APK following this Expo tutorial. This will give you a working Android/IOS application.
- The application works real-time. If more users are logged in with the app, GraphQL Subscriptions will update everything real time.
- In my schema.graph model file I added @auth ( “owner” ) which forces CRUD only to GET your own items. Therefore, only my quotes will appear here. Remove this if you want all users to see all quotes.
- The name used is the name you register with on the registration screen. The registration screen is packed around the application itself with the withAuthenticate() function from Amplify.
This application “Quoted”, I will use with my group of friends to add each other’s quotes, and I’ll add more functionality for changing the author of the quote etc.
Thanks for reading, go get your mobile applications flowing. I’ll continue writing articles to promote Amplify, as I find it so useful for testing out many of the ideas I have.

I wish I had this article when I first started on React Hooks
Key points of React Hooks explained as clear and simple as I could make it.
